Tutorials
Run your first class
Create a class, schedule a session, take signups, mark attendance, award a cert.
This tutorial walks you through the full lifecycle of a class in your space: you will create a class offering, schedule a session with a capacity, watch members sign up (with a waitlist when it fills), mark attendance as the instructor, and complete the session so it can award a certification. By the end you will have run one class from start to finish.
Set aside about fifteen minutes. You will need the classes.manage permission to create classes and sessions, and classes.instruct to run the session and mark attendance. Both are granted to the board role by default. To have completion award a certification, the instructor also needs certifications.grant.
Before you start
- Sign in as a member with
classes.manage(a board member by default). - Optional: if you want the class to award a certification, create the certification type first at /certifications. Note its name.
Step 1: Create a class
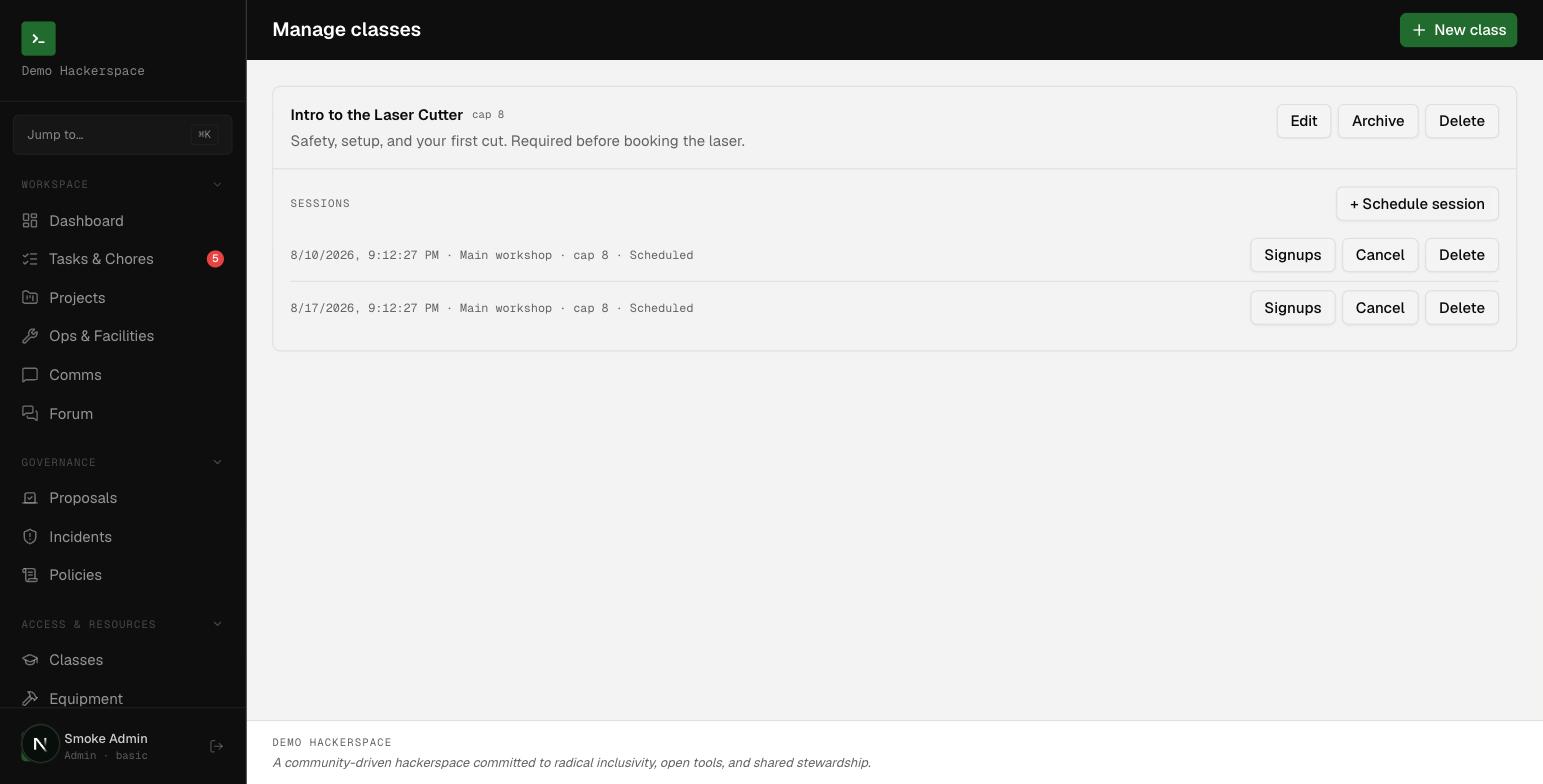 The class management screen. A new space starts empty; begin by creating a class, then schedule sessions members can sign up for.
A class is the reusable offering ("Woodshop Basics"). Sessions are the individual scheduled occurrences you will add later.
- Go to /classes/manage.
- Select New class.
- Enter a Title, for example
Woodshop Basics. Add an optional description. - Optionally set a Default capacity. Leave it blank for unlimited. Each session can override this later.
- Optionally, in the certification dropdown, choose Grants:
<your cert>so completing a session awards that certification to attendees. - Select Create class.
You will see a "Class created" confirmation and the class listed with any cap and grants badges you set.
Two optional fields you can ignore for this tutorial: a Payment link (a plain external URL shown to members, with no live payment processing) and a required form that gates signup until the member has it on file (for example a liability waiver published under /forms).
Step 2: Schedule a session
- On the class card, select + Schedule session.
- Set Starts (and optionally Ends). Ends must not be before Starts.
- Optionally add a Location, a Capacity override, and Notes.
- Select Schedule.
The session appears under the class with its start time and a Scheduled status. The effective capacity is the session's capacity override if set, otherwise the class default; if both are blank, the session is open (unlimited).
Step 3: Members sign up
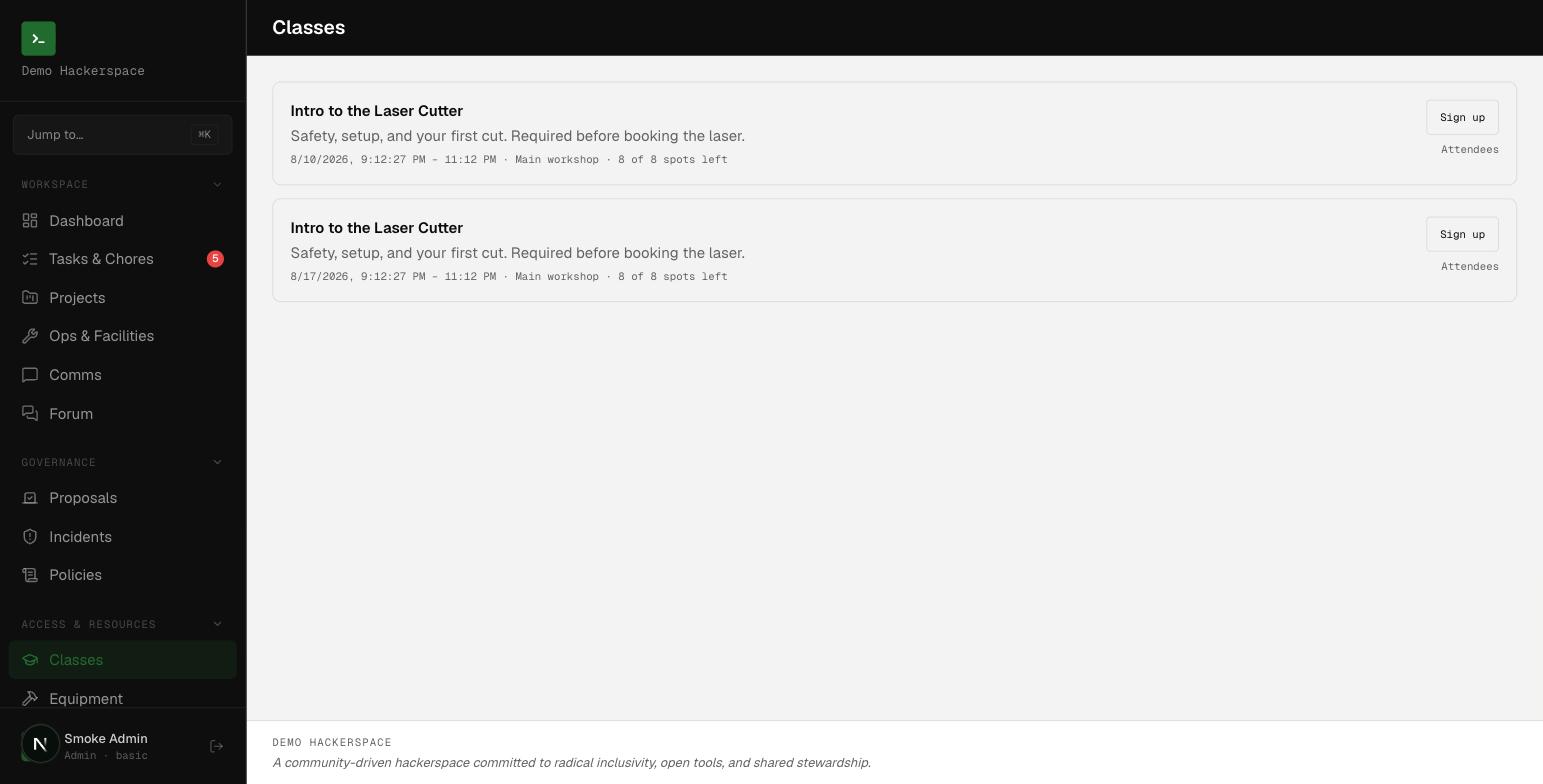 The member class view: each upcoming session shows its time, location, spots left, and a Sign up button.
Members do not need any special permission to sign up, only membership in the space.
- As a member, go to /classes. Upcoming, non-cancelled sessions appear with "X of N spots left" (or "open" when unlimited).
- Select Sign up. You will see "You are signed up" and a Registered badge.
When registered signups reach capacity, the button reads Join waitlist instead, and new signups get a Waitlisted status. A member can select Cancel signup at any time; if a registered member cancels, the earliest waitlisted member is automatically promoted to registered and emailed. If the class requires a form the member has not submitted, the button becomes Complete required form and links to the form first.
Step 4: Mark attendance
Now switch back to someone with classes.instruct. (A user with only classes.manage can open the roster and see who signed up, but cannot check attended or run Complete session, both require classes.instruct.)
- On /classes/manage, find the session and select Signups. (Instructors browsing /classes can use Attendees on the session instead.)
- The roster lists each signup with its status. Check the attended box next to each member who showed up.
Attendance is what determines who receives a certification in the next step, so check it before completing.
Step 5: Complete the session and award the certification
- In the same attendees panel, select Complete session.
- The session status changes to Completed.
If the class grants a certification, completion awards it to every member you marked as attended. The result confirms how many certificates were issued. If the instructor lacks certifications.grant, the session still completes but you will see "Certificates were NOT issued (requires the certifications.grant permission)", grant that permission and the members can be certified through /certifications.
Members can see their signups and completed sessions on their own page at /me, and any certification they earned appears in their certifications.
What you built
You now have a class with one completed session, an attendance record, and (optionally) certifications awarded to attendees. From here you can:
- Schedule more sessions of the same class, the offering is reusable.
- Archive a class you no longer offer instead of deleting it (deleting is only allowed when a class has no sessions).
- Cancel a session instead of deleting it to keep the signup history; every signed-up member is emailed when you do.
See the classes, certifications & equipment reference for every field, status, and permission, including how certification types are defined and granted on class completion.