Tutorials
Set up your space
Create or join a space, land as an admin, and get your bearings.
This tutorial walks you from a blank signup form to a working space where you land as an admin, then gives you a quick tour of the dashboard and left navigation so you know where everything lives. It takes about five minutes.
By the end you will have a space of your own, an admin membership inside it, and a mental map of the sidebar.
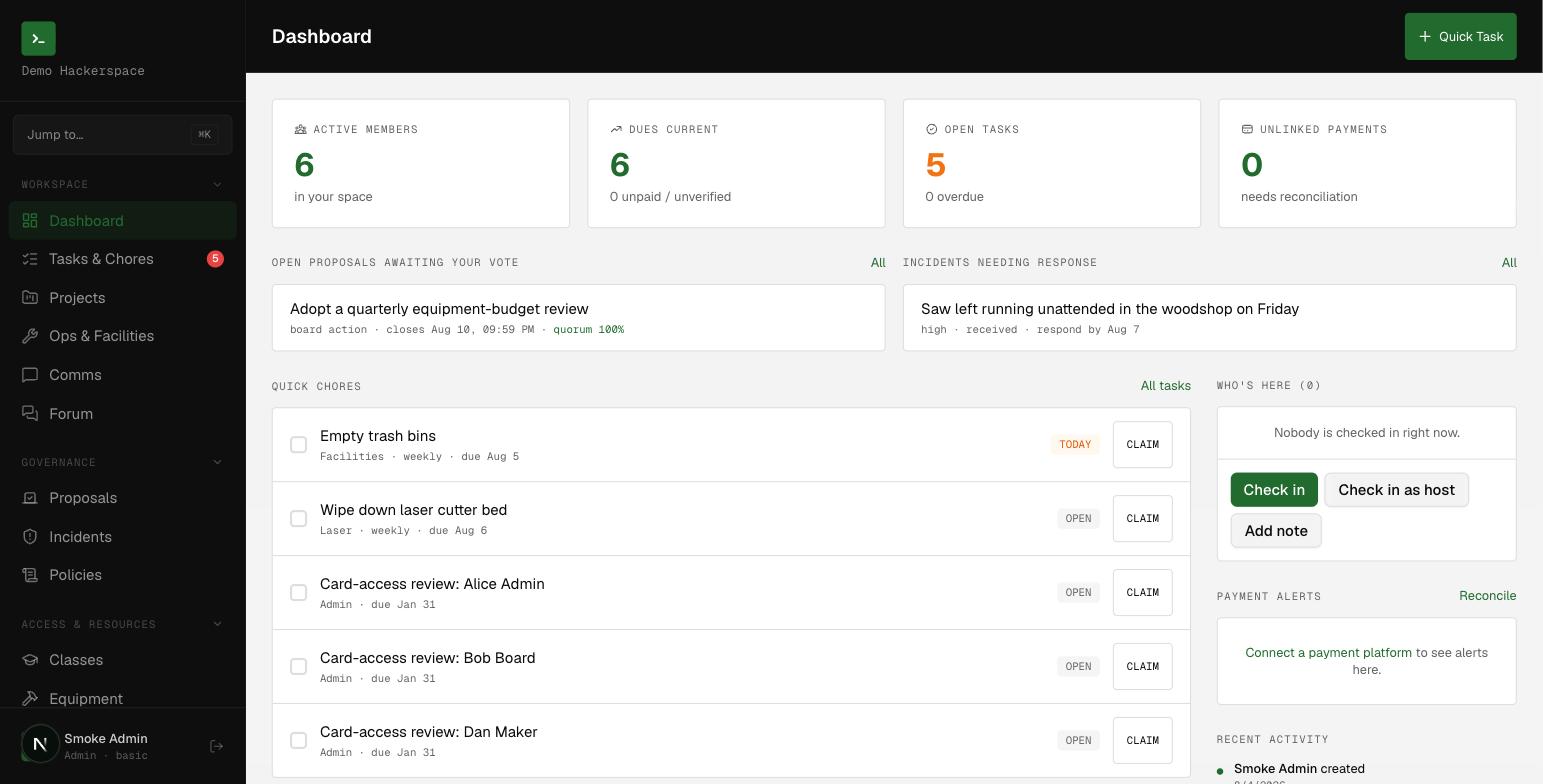 The dashboard: stat tiles, open proposals and incidents, quick chores, and who is checked in.
Before you start
You need an email address and a password of at least 8 characters. If someone has already set up a space for your group and given you an invite code, skip ahead to Joining an existing space instead.
Step 1: Create your account
- Go to
/signup. - Under Create your account, fill in Full Name, Email, and Password (minimum 8 characters).
- Under What are you doing?, click the Create a Space card.
- Click Continue →.
Step 2: Name your space
Now you are on the Set up your Space step.
- Enter a Space Name, such as
HeatSync Labs. As you type, a Slug is filled in for you automatically, it is the lowercase, letters-and-numbers-only handle for your space (for exampleheatsynclabs). You can edit it. - Optionally enter a City / Location.
- Read the note: you will be the admin of this space, and default channels (general, announcements, ops) are created for you.
- Click Create Space →.
Depending on how email confirmation is configured, one of two things happens:
- You go straight to
/dashboard, already signed in. - You are sent to
/signup/confirmto verify your email first. Open the link in that email, and you will land on the dashboard afterward.
That is it, your space exists. As the founder you are set up as an admin on the plus tier with a current status, and you skip the member onboarding flow entirely.
Step 3: Get your bearings on the dashboard
The first time you open /dashboard in an empty space, you see a "Let's set up your space" panel instead of a grid of zeros. It offers four first steps:
| Step | Where it goes |
|---|---|
| Invite or add members | /members |
| Set up onboarding | /customize |
| Create your first task or chore | /tasks |
| Connect payments | /settings |
That panel disappears on its own once there is real activity. After that, the dashboard shows a stat row (Active Members, Dues Current, Open Tasks, Unlinked Payments) plus quick chores, active projects, who is present now, and recent activity. The Quick Task button in the header jumps to /tasks.
Step 4: Explore the left navigation
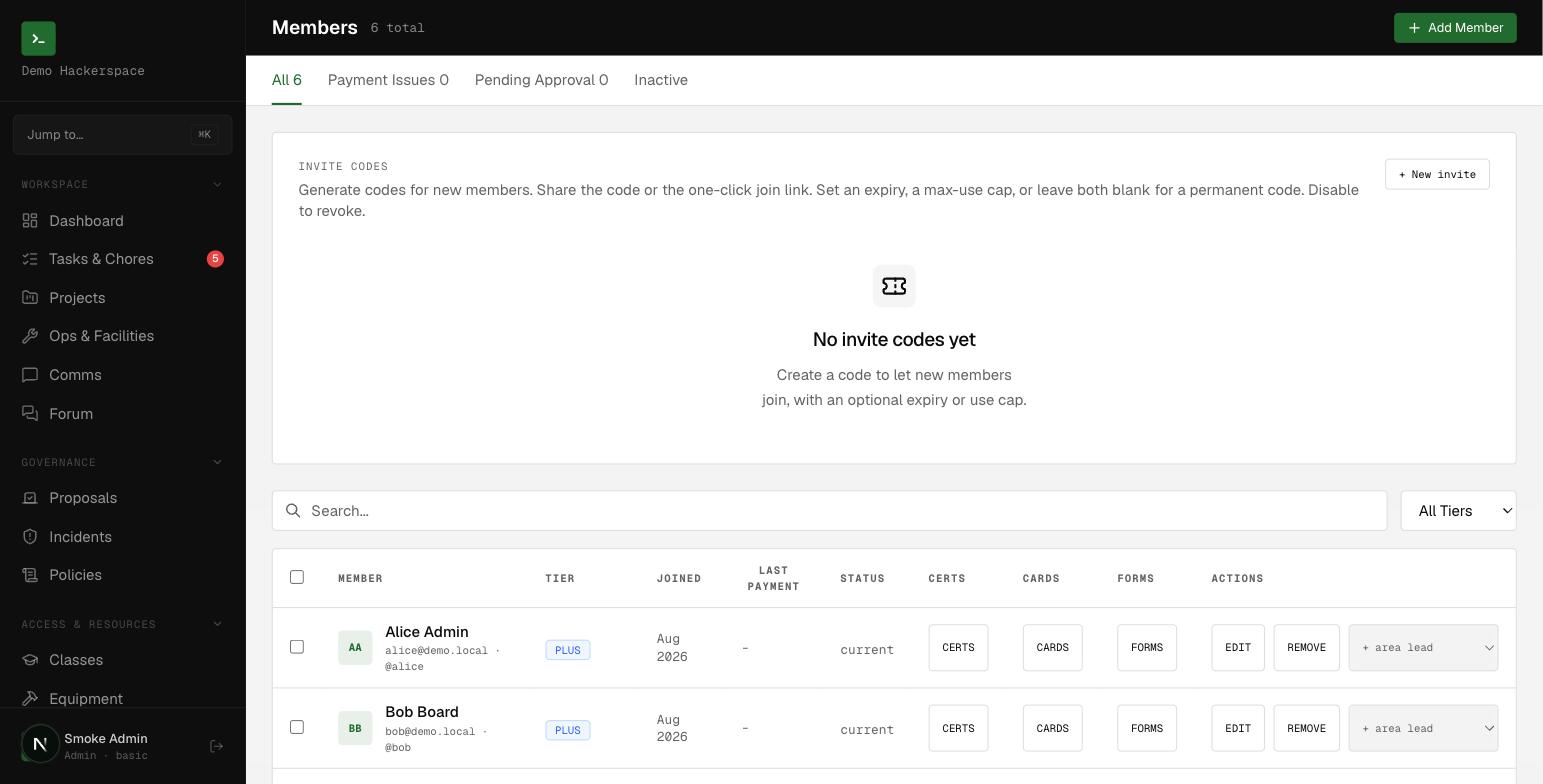 The Members screen is one stop on the left nav: the roster, dues status, and per-member actions.
The sidebar groups every screen into sections. As an admin you see all of them:
- Workspace, Dashboard, Tasks & Chores, Projects, Ops & Facilities, Comms, Forum
- Governance, Proposals, Incidents, Policies
- Access & Resources, Classes, Equipment, Doors, Forms
- People, Members, Attendance, Contacts, Recruitment
- Finance, Payments, Financials
- Account, My membership
- Admin, Customize, Settings, Import / Sync, and the management screens for forms, certifications, classes, equipment, and doors
The Admin section only appears for admins, board members, or members you have granted a specific manage permission. There is also a Jump to... button at the top of the sidebar (or press ⌘K) that opens a command palette for fast navigation.
A good next stop is inviting your first members, or /customize to shape what new members see when they join.
Joining an existing space
If you were given an invite code instead of starting a new space:
- Go to
/signup(or open the/signup?invite=CODElink your admin shared, which prefills the code for you). - Fill in your account details and click the Join a Space card, then Continue →.
- Enter the Invite Code, it looks like
HSL-2025-XXXX. Ask your space admin for it if you do not have one; they can find the space's default code under Settings. - Click Join Space →.
You join as a member. If the space requires approval (the default), your status starts as unverified and an admin approves you before you gain full access, until then the dashboard is still yours to look around. If the space does not require approval, you are current right away.
What you did
You created (or joined) a space, landed with the right role, and learned where the dashboard and sidebar put things. From here, follow the dashboard's setup steps to add members, build your onboarding flow, and start capturing tasks.